(I have recently answered this question on Quora – if you prefer you can comment or discuss this question there)
It’s not difficult to learn night photography (or low light photography in general), but it’s difficult to master. As with everything else – practice makes perfect.
Here’s a story how I learned my night photography. I was approached by a very talented team wanting to shoot tango dance moves in the streets of NYC. The problem was – neither one of them was a professional dancer, so it took way longer than anticipated. In other words – the photoshoot went way into the night. We picked a spot where we had dancers under a street light and we’ve got this night photography image.
We went back and did a second shoot on a different day. Instead of tango we shot a “west side love story gone wrong” concept. You can see the resulting “Love Story Gone Wrong” image here. Both images were shot around 10 – 11pm.
I had no prior experience shooting during night hours before participating in these photo shoots. However, I had a basic understanding of how low light photography works. There are three parameters you can work with – aperture, shutter speed and ISO sensitivity. You push each one (in that order) to the point when you can’t push it anymore and then you start pushing the next. It’s good to have equipment that can help at night photography – fast lens for wide aperture, tripod for slower shutter speeds and camera that doesn’t have much noise on high ISO settings. The only thing I had was f/2.8 70–200 Sigma lens, D700 camera and slow breathing technique to shoot around 1/60s shutter speed.
I took literally hundreds of shots – I knew some of them would be out of focus due to holding camera in hands (no tripod). I assumed a seated position (look up sniper poses online – there’s very little difference between stabilizing the camera and stabilizing a rifle) and had models to ease into their poses slowly. I used continuous shooting – high speed setting on the camera in order to get as many frames of the proper pose in as little time as possible. For the second shoot – they just acted their “scenes” out in the street and I took as many shots as camera allowed. If I remember correctly D700 allowed 7 or 8 frames per second on high speed and a sequence would fit about 14 before buffer overloaded and camera needed some time to store buffered images onto CF card.
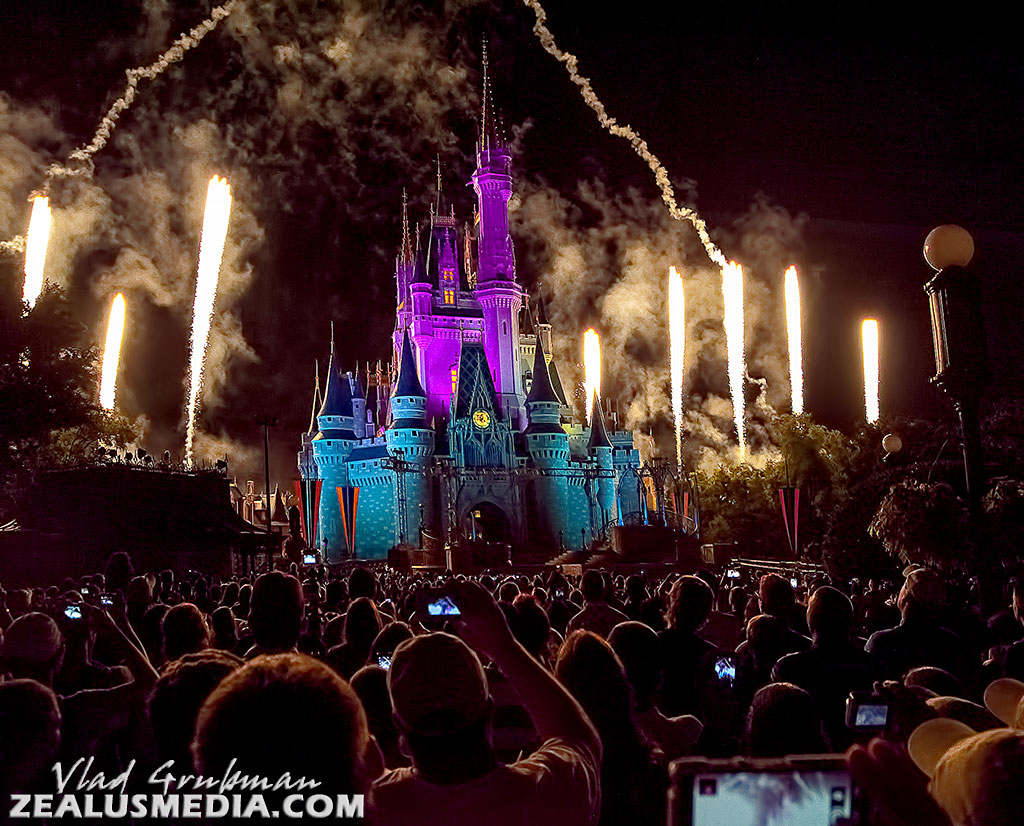
Sometimes, however, you just don’t get lucky to have time to think and prepare – you just get your camera out and shoot without even a moment’s notice. I had over a hundred shots standing in the middle of the pushing crowd and only one came out the way I wanted – it’s the image at the beginning of this answer. This was taken on full manual with bracketing (+/- 1 stop) – because shooting this on auto would have increased shutter speed to the point when everything would have been jittery.
In most cases you, however, can be prepared and even bring your lightning equipment with you. That’s when you can experiment, set up proper lighting and get simple images like this Catwoman (this is shot around 11pm).
This shot of Chicago at night was done around 10 – 11pm from tripod and on slow shutter speed, fast lens (50mm f/1.8) and wide aperture.
And sometimes you get to make night time out of 2pm bright sunny day. Simply because you just won’t have another chance at the scene line this (this is shot during Marcus Hook Pirate Festival in Pennsylvania at around 2 – 4 pm).
In order to get really good images you will end up post processing them – I don’t believe there’s a way around it. Unless you are happy with grainy images with somewhat strange colors – you’ll end up in Photoshop/Lightroom/whatever else you like and you will get them fixed.
Therefore it’s not just the knowledge itself (although I encourage anyone to learn as much as possible) but knowledge plus experience and experimenting that will get you where you want to be.